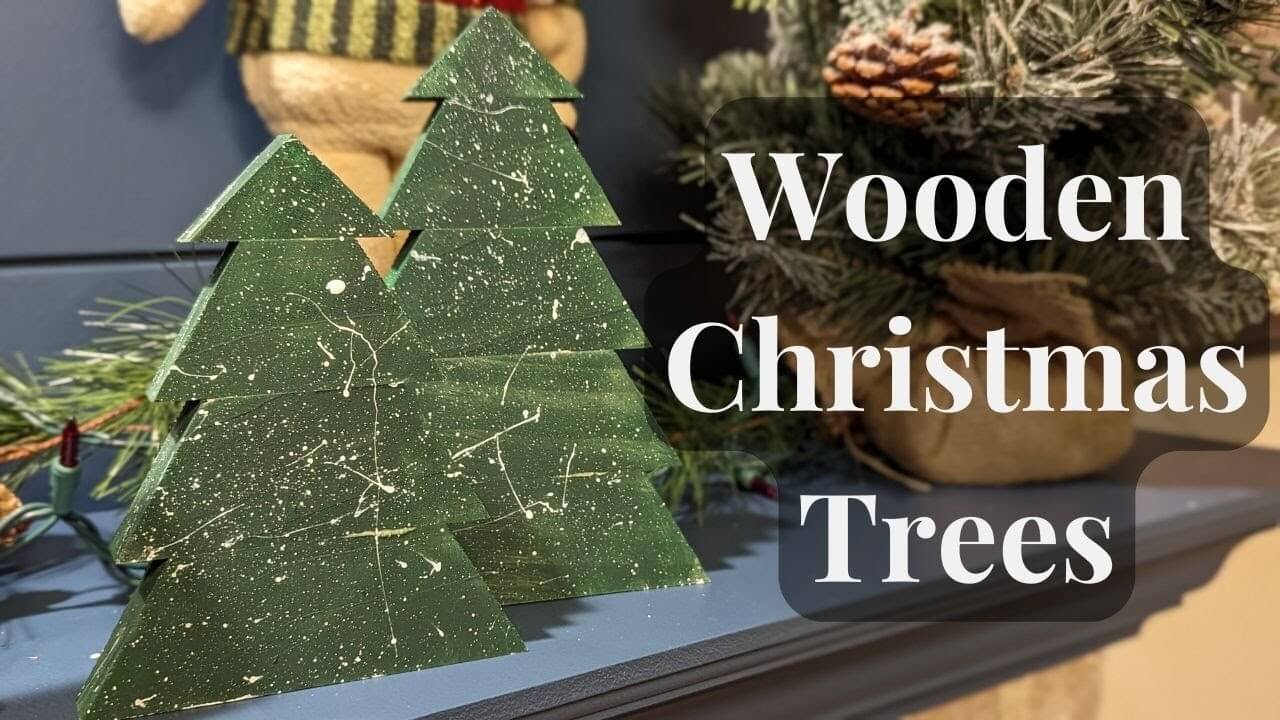
It’s Christmas time, and if you’re anything like me, you’re itching to get out into the shop, fire up the saw, and make something festive. One of my favorite seasonal projects—and a fantastic way to add charm to your home—is crafting Wooden Christmas Trees. Not only are these easy and fun to build, but they’re also budget-friendly and make perfect decorations or gifts. In this article, I’ll walk you through exactly how I made mine and offer some ideas for customizing them.
Whether you’re looking for a meaningful project during your holiday break or want a decorative element that’s handmade and personal, these Wooden Christmas Trees are just the thing.
Table of Contents
Steps to Making Wooden Christmas Trees
Step One: Cutting the Wood for the Tree Shape
To start, I grabbed a 1×2 board from my scrap pile and headed over to the miter saw. While I used power tools, you can definitely cut these by hand with a miter box—it just takes a bit more elbow grease.
I began by setting my saw to a 45-degree angle to make the top of the tree. This sharper angle gives the tip a classic triangle shape. If you use a more shallow angle, the tree will end up with uneven sides, so the 45° is key for a symmetrical look.
After cutting the top, I adjusted the miter saw to 30 degrees for the rest of the tree. This created longer, more tapered “branches,” resulting in a slimmer profile overall. If you want a fuller, bushier look, sticking with 45 degrees throughout works too.
For each additional “branch” piece, I let it overhang the one above it by about half an inch on each side. You simply flip the board between each cut to maintain the correct angles. There’s no need for precise measurements—just be consistent. Keep stacking and cutting until you’re happy with the size. I stopped at about five pieces for a medium tree, but you could make them as tall or as short as you like.
Step Two: Gluing the Tree Together
Once I had all the pieces cut, I moved over to the workbench to glue them up. For a simple decorative project like this, I skipped wood glue and clamps and went with CA glue (cyanoacrylate), which comes with an accelerator. This adhesive bonds instantly and works great for small crafts.
To glue, I applied a line of CA glue to one piece and spritzed the mating surface of the next piece with the accelerator. Once they touched, they bonded instantly—so make sure your alignment is correct before making contact. I repeated this step all the way up the tree.
Pro tip: Be cautious with CA glue. It will bond your fingers if you’re not careful.
- Easy Bonding – The simple to use instant glue will make your projects so much easier! After cleaning both surfaces, just spread the 2-3 drops of CA glue per square inch on one surface & spray the glue activator spray on the other, wait 10 seconds and then bond the pieces 5-12 seconds together.
- Powerful Professional Adhesive – Our two part CA Glue with activator will help you achieve a clean and professional result no matter what your project is. Great for industrial and personal projects, this super glue will give you the bond you need!
- Quick Cure Time – No time to wait? With our instant bond adhesive, your project will be ready in seconds! Thanks to our special CA Glue Activator, your project will be ready in 5-12 seconds. Without the activator, cure time can take up to 2 minutes.
- Clean Application – The aerosol super glue accelerator provides a fine mist that is easy to control, and thanks to the viscous liquid of the glue your project won’t be a mess. Just a little bit of two part super glue will be plenty!
- Compatible With Multiple Materials – This cyanoacrylate accelerator is suitable for use on a variety of materials from wood to glass & stone to metal. Avoid using the cyanoacrylate glue on nonstick surfaces and polyethylene products.
Last update on 2025-08-06 / Affiliate links / Images from Amazon Product Advertising API
Step Three: Painting Your Wooden Christmas Trees
With assembly done, it was time to add some festive flair. I grabbed a couple of acrylic paints: a dark forest green and a holiday green, along with titanium white for snow effects.
I painted the base coat in the dark green, not worrying too much about being neat—this is a rustic project, after all. Once dry, I lightly highlighted the edges of the tree with the lighter green, which gave it dimension and depth.
Then came the fun part—adding snow. I dipped a stiff-bristled brush into the white paint and flicked it onto the tree for a scattered snowflake effect. You could also dab on red and gold dots to mimic ornaments or add a star at the top.
Why Wooden Christmas Trees Are a Must-Make Project
These Wooden Christmas Trees are a simple way to bring the spirit of the holidays into your home or workshop. They’re inexpensive, quick to make, and offer plenty of room for creative expression. Whether you’re crafting one tree or a whole forest, they’re perfect for mantels, porch decor, tabletops, or even as handmade gifts.
All it takes is a single 1×2 board, a bit of glue, and some paint—supplies you likely already have on hand. And the best part? The project offers instant gratification. From the first cut to the final snowflake, you can complete it in an afternoon.
Why You Should Try Making Wooden Christmas Trees
If you’re searching for a satisfying, festive, and affordable holiday project, Wooden Christmas Trees deliver on all counts. Not only do they look great, but they’re also fun to make and provide a wonderful way to use up scrap materials. Whether you’re painting, gluing, or designing your own tree shape, each one becomes a personalized piece of holiday joy.
So get out in the shop, fire up your creativity, and make something magical this season. These Wooden Christmas Trees might just become a new tradition.
Happy holidays, and Merry Christmas!


