This is part 2 of the raised garden bed article. Check out part 1 – Powerful DIY Guide: Build a Raised Garden Bed That Keeps Pests Out.
Creating a raised garden bed is one of the smartest moves you can make to jumpstart your backyard gardening efforts, and in this part of the project, I’m wrapping up the build with a protective netting top. Whether you’re fighting off squirrels, birds, or just want your plants to grow in peace, this design offers strength, simplicity, and affordability. In this article, I’ll walk you through the second half of the process—constructing and attaching a hinged top with PVC hoops and netting, using a few basic tools and a bit of elbow grease.
Table of Contents
Building the Top Frame for the Raised Garden Bed
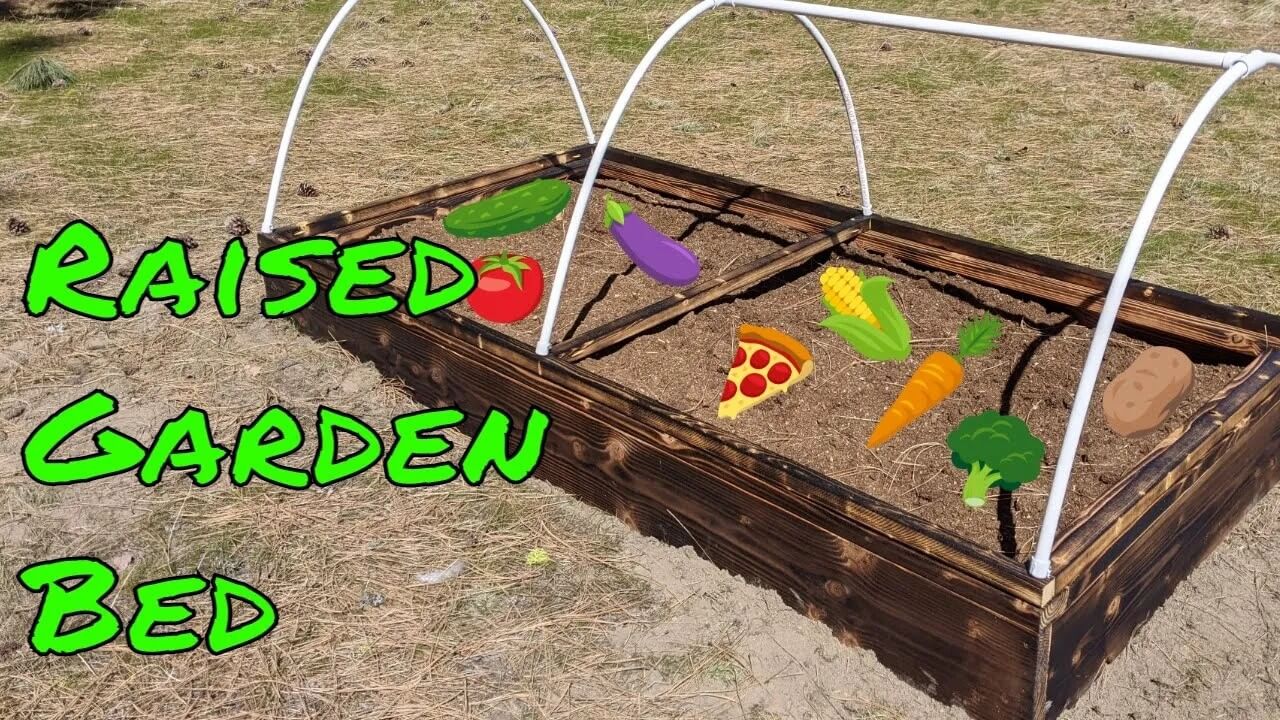
With the base of the raised garden bed already built, I turned my attention to the top section, which functions kind of like a hoop house. I built the frame using simple 2×2 lumber. This top frame acts as the backbone of the structure, supporting the PVC hoops and the protective netting.
To make the frame easier to access, I hinged one side so I could lift the top when needed. You don’t absolutely need pocket hole screws for this step. Regular bracing would work just fine. But since I already had a pocket hole jig, I used it for cleaner joints and added strength.
Prepping the PVC Caps and Rethinking the Order
Before assembling the hoops, I pre-drilled half-inch PVC caps to mount them on the top frame. I originally screwed them in place right away—but that was a mistake. I wanted to apply a shou sugi ban finish (a traditional Japanese technique that uses fire to seal and preserve wood), and those plastic caps would have melted right off under the flame. So I took them off, fired up my torch (the ignition didn’t work, so I used a lighter), and scorched the wood for a beautifully durable charred look.
Installing the Hoops and Cross Support
After finishing the wood, I reattached the caps and started bending the PVC into hoops. To strengthen the structure and prevent sagging, I added a cross beam across the top. At first, I thought three supports would be necessary, but once everything was in place, one solid cross support did the job well.
This part was more physical than technical. Bending the PVC into shape required a little muscle, but the result was worth it. I used ¾-inch PVC T-fittings to support the cross bar, sliding them into place before fixing the hoops into their sockets.
Filling the Raised Garden Bed with Soil
Before I attached the hinged top, I filled the bed with soil. This made working inside the frame easier and allowed me to finalize the structure without straining over loose boards or trying to avoid tipping it. I started with a few bags of topsoil and then mixed in compost made from chick manure and wood chips. This rich, heavy blend provides nutrients and drainage—perfect for vegetables or herbs.
Final Assembly and Hinges
With the soil in and the frame leveled, I installed the top with a basic set of hinges. This allows the whole structure to open like a lid, giving me full access to the garden when planting, weeding, or harvesting. The netting will go on top to keep pests out while allowing sunlight and rain in.
This build was extremely budget-friendly. Given the price of lumber these days—somewhere around $8 per two-by-four—it was nice to complete a project without breaking the bank. And best of all, I now have a raised garden bed that is secure on all sides but still easy to use.
Raised Garden Bed Success with a Protective Twist
This raised garden bed project turned out to be both practical and rewarding. By adding a hinged netting top with PVC hoops, I created a structure that shields my crops without sacrificing convenience. It’s a strong, cost-effective solution for anyone looking to keep their garden thriving. Whether you’re a seasoned grower or just getting started, this setup offers flexibility, protection, and a touch of style with that burned-wood finish.


