Changing your brake fluid might not generate the same garage excitement as slapping on a turbocharger or rebuilding a transmission—but neglecting it can quietly ruin your braking system. In this ultimate guide, I’m going to show you exactly how to flush brake fluid using a power bleeder, a few affordable tools, and some shop-tested common sense. Not only will this give you the confidence to tackle this often-ignored maintenance task, but it’ll also help keep your brakes performing at their best.
Yes, “how to flush brake fluid” is one of those topics that causes debate across every forum and Facebook group. Some folks never change it and drive their cars into the junkyard just fine. Others, like me, change it every couple of years because brake fluid is hygroscopic—it pulls moisture from the air—and moisture equals rust, corrosion, and mushy pedal feel. So let’s walk through how I do it, and how you can too.
Table of Contents
Tools You’ll Need to Flush Brake Fluid Right
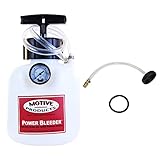
Let’s talk gear. My go-to method for flushing brake fluid is power bleeding. For that, I use a Motive Products Power Bleeder, which comes with interchangeable caps to fit different vehicle master cylinders. It’s simple, reliable, and gets the job done fast.
Here’s what else I use:
- DOT 3 brake fluid (for my specific vehicle)
- A disposable syringe (to pull old fluid from the reservoir)
- A line wrench (10mm and 11mm—prevents stripped bleeder screws)
- A liter bottle with a clear hose (to collect and inspect old fluid)
- Brake cleaner and clean rags (because brake fluid + paint = disaster)
- Optional: a brake fluid tester to check moisture levels
If this is your first time learning how to flush brake fluid, make sure to confirm your brake system type. DOT 3 and DOT 4 are usually interchangeable, but DOT 5 is silicone-based and incompatible with DOT 3/4 systems.


Last update on 2025-10-02 / Affiliate links / Images from Amazon Product Advertising API
Testing Your Brake Fluid Before You Flush
Before diving in, I like to test my brake fluid. I use a moisture tester with settings for DOT 3, DOT 4, and DOT 5.1. Mine read less than 1% moisture content—pretty good after two years. But since the fluid looked like weak honey and not that clear, golden color you want, I decided it was time to flush it.
Using a syringe, I tried to remove the old fluid from the reservoir. But some vehicles (like mine) have internal baffles that make this impossible. So instead of siphoning out the old stuff, I just overfilled the reservoir with fresh fluid and moved on to the flush.
How to Flush Brake Fluid Using a Power Bleeder
Let’s get into the nitty-gritty of how to flush brake fluid the right way.
I don’t fill my power bleeder with fluid. The manufacturer recommends it, but I’ve had hoses fail on me before. I prefer to run the bleeder dry and watch the master cylinder reservoir closely during the process to make sure it doesn’t run below the minimum line.
Step-by-step process:
- Fill the reservoir past the max line with new brake fluid.
- Pressurize the bleeder to about 15 psi.
- Starting at the passenger rear caliper (the furthest from the master cylinder), attach your collection bottle to the bleeder valve.
- Crack open the bleeder screw and let the fluid run. You’ll see the old, nasty fluid at first.
- Once you see clear fluid, close the bleeder.
- Check the reservoir and top it off.
- Repeat for the driver rear, then passenger front, then driver front.
This sequence—furthest to nearest—ensures you flush the entire system efficiently. If your vehicle’s master cylinder is on the driver’s side (like most), this sequence works well. Always double-check for specific routing on oddball vehicles, though.
Results You Can See
As I worked through each caliper, I could clearly see the change from brownish sludge to fresh, clear fluid. The difference was night and day. It’s incredibly satisfying to watch that transformation, especially knowing your brakes will perform better and last longer because of it.
Just be sure to monitor that reservoir the entire time. Letting it run dry introduces air into the system—and then you’ll have to bleed the whole thing all over again.
Why You Should Know How to Flush Brake Fluid
So there you have it—how to flush brake fluid from start to finish using a power bleeder. This isn’t just a routine maintenance tip; it’s a system-saver. Brake fluid absorbs moisture over time, and when that moisture builds up, it corrodes your lines, compromises your calipers, and ruins your stopping power.
Doing it yourself saves money, builds confidence, and ensures it’s done right. I recommend flushing your brake fluid every two years—especially if you live in a humid climate or do a lot of towing or spirited driving.
If you’re on the fence, pick up a brake fluid tester and see where your system stands. Either way, now you know exactly how to flush brake fluid and keep your ride safe, responsive, and road-ready.
Knowing how to flush brake fluid puts you in control of your vehicle’s safety. It’s simple, effective, and rewarding—and it helps prevent bigger problems down the road. Whether you’re a seasoned DIYer or just learning the ropes, adding this skill to your toolkit is a power move for any car owner.